Week 2, Part 2/2
I had previously modelled my human character, applied textures and created several short animations. Now it's time to import all of this into Unity and give the player some control.
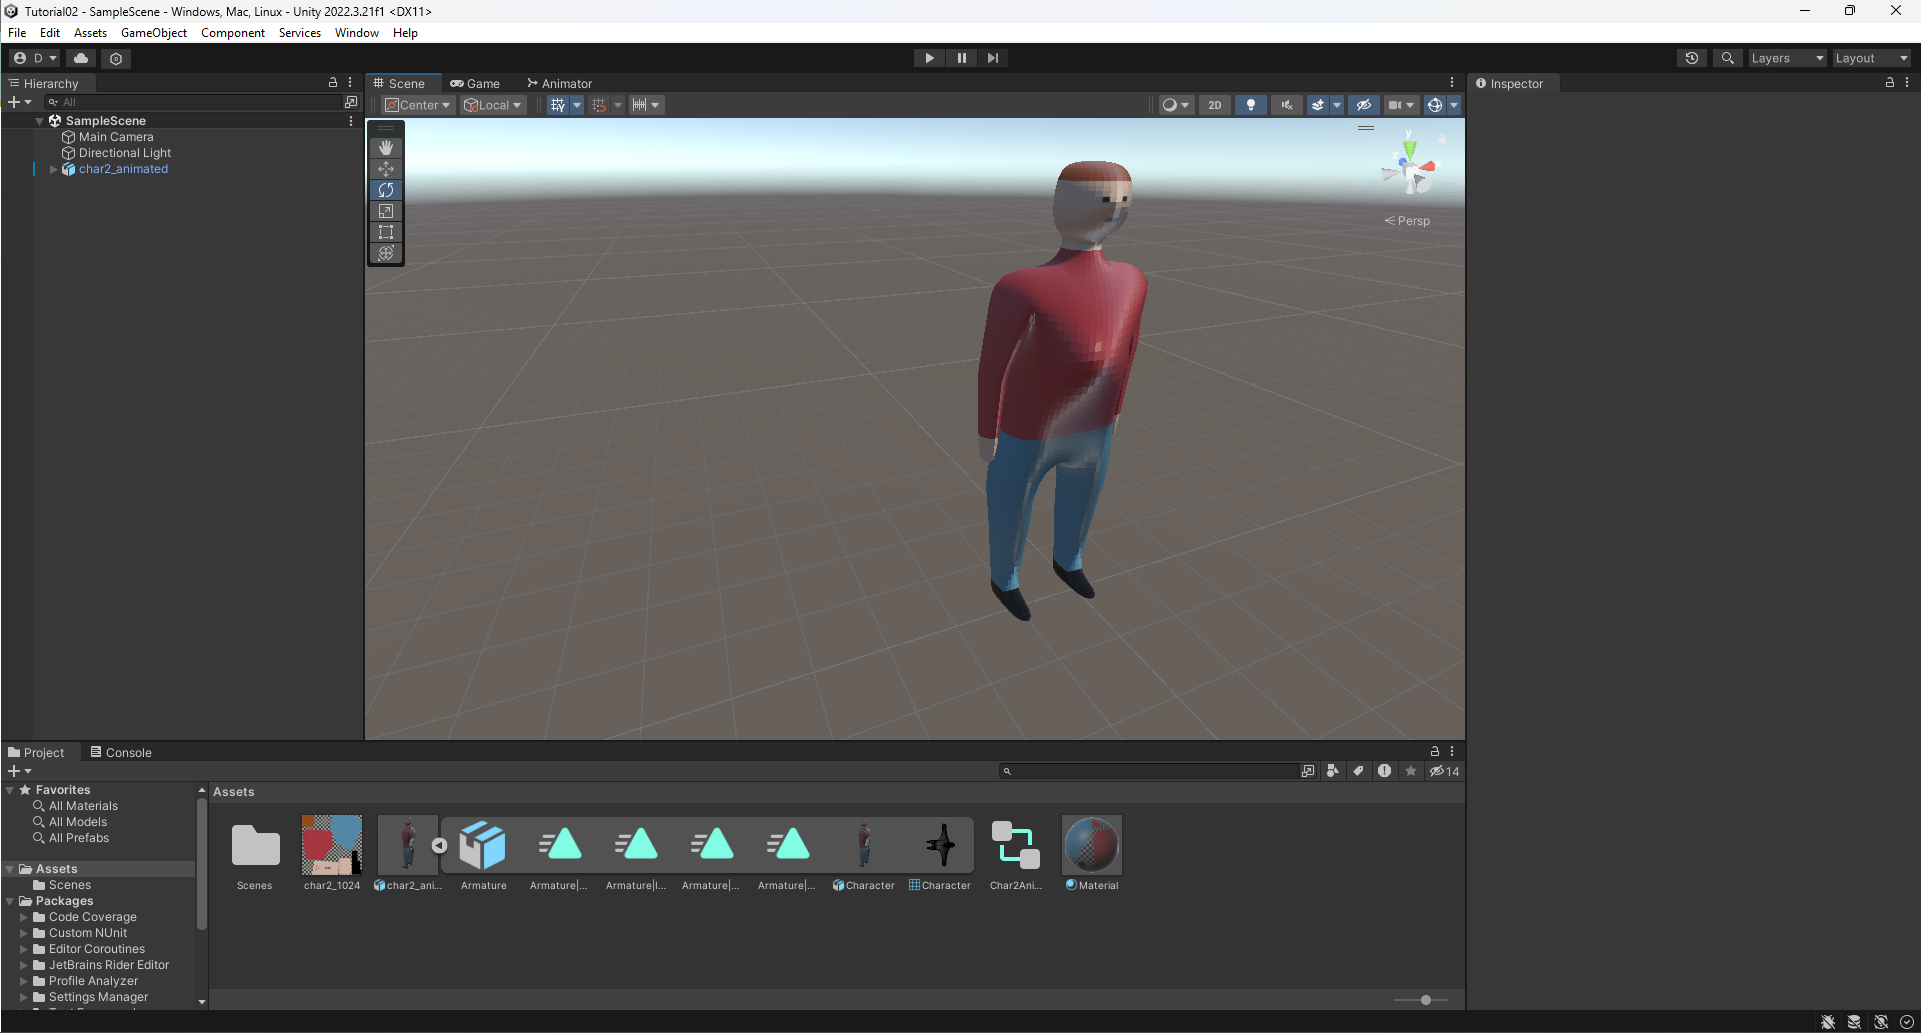
When I first imported the model, I was a little disappointed that it didn't look as nice as it did in Blender. When I was viewing the model in Blender, I did not have any lights setup, so I did not see how the model would look under harsh lighting - something to keep in mind for next time. I am happy that the materials and animations carried over without any issues, but I can definitely see where I can make improvements in model design.
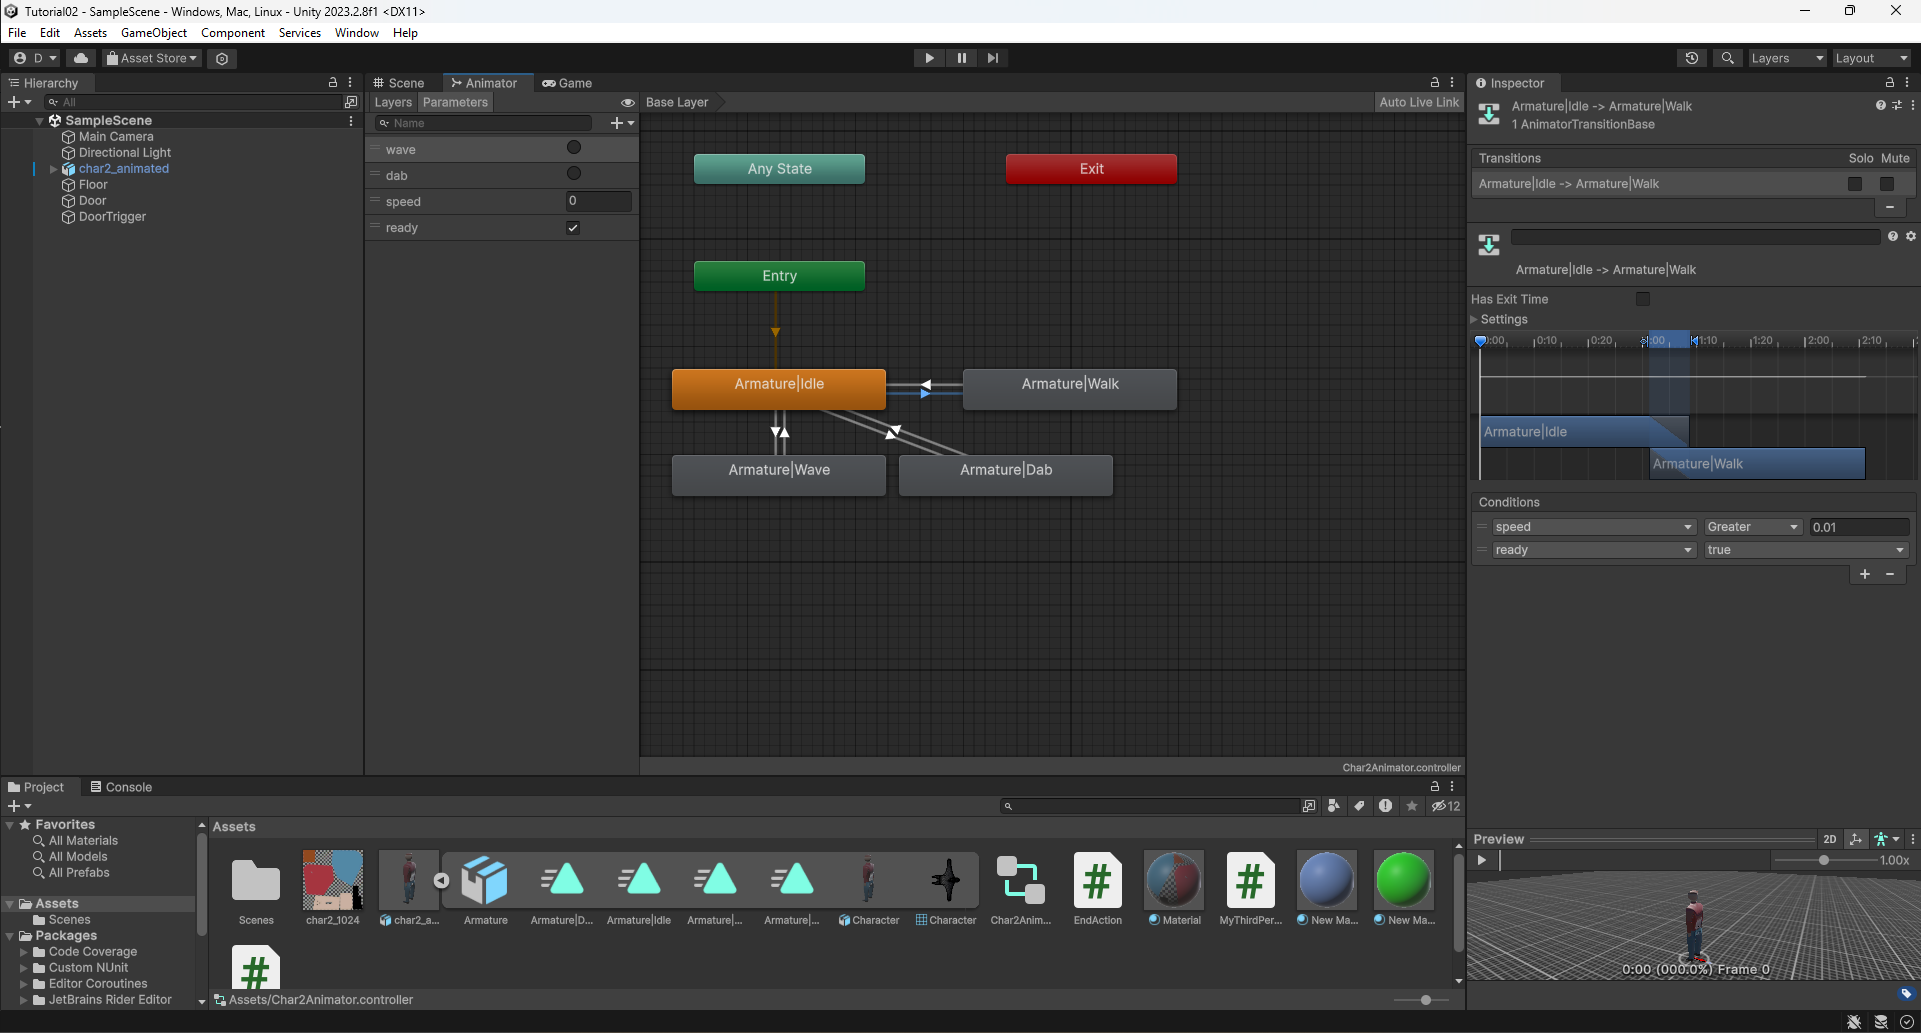
Importing the animations was quite straightforward, just drag and drop, then tell Unity which animations should be looped when they are playing. Repeating animations, such as the idle animation and walking, are played on a loop so they don't need to be triggered in code every few seconds. Unity has a handy animation state machine so the game designer can control which animations will be played at which times and can easily add conditions dictating when to change states. A screenshot of this process is shown below. In the middle of the screen are the animations that have been imported, with arrows showing the possible transitions between them. On the right we can see conditions for moving from "idle" to "walk" - the variable "speed" must be greater than 0.01 (this is assigned in code), and the variable "ready" must be "true". In this case "ready" is known as a Boolean variable with two possible values: true or false.
I think I spent most of my time getting these animations just right. I encountered several issues, such as preventing the character from walking while performing other actions, but much trial and error and watching this YouTube tutorial helped a lot: How To Make A Character Walk in Unity 2021 (youtube.com). The user can now make the character wave by pressing the 1 key, dab by pressing the 2 key, and walk around using WASD. When standing still, the idle action will play on repeat. Here is a screenshot of the code used for controlling user actions:

There is more to the process than just this code snippet, but I think this gives a decent impression of the steps involved. We can see in this code that the "ready" variable that was set in the Unity animation tool previously is assigned the value "false" when we trigger the waving and dabbing animations. This is to prevent the character from floating along the ground while performing other actions.
I also created a "door" which opens (disappears) when the user walks in front of it. The door is simply a door shaped box, with another invisible box sitting in front of it which detects when the user walks inside it. This triggers a function which simply removes the door from the level.
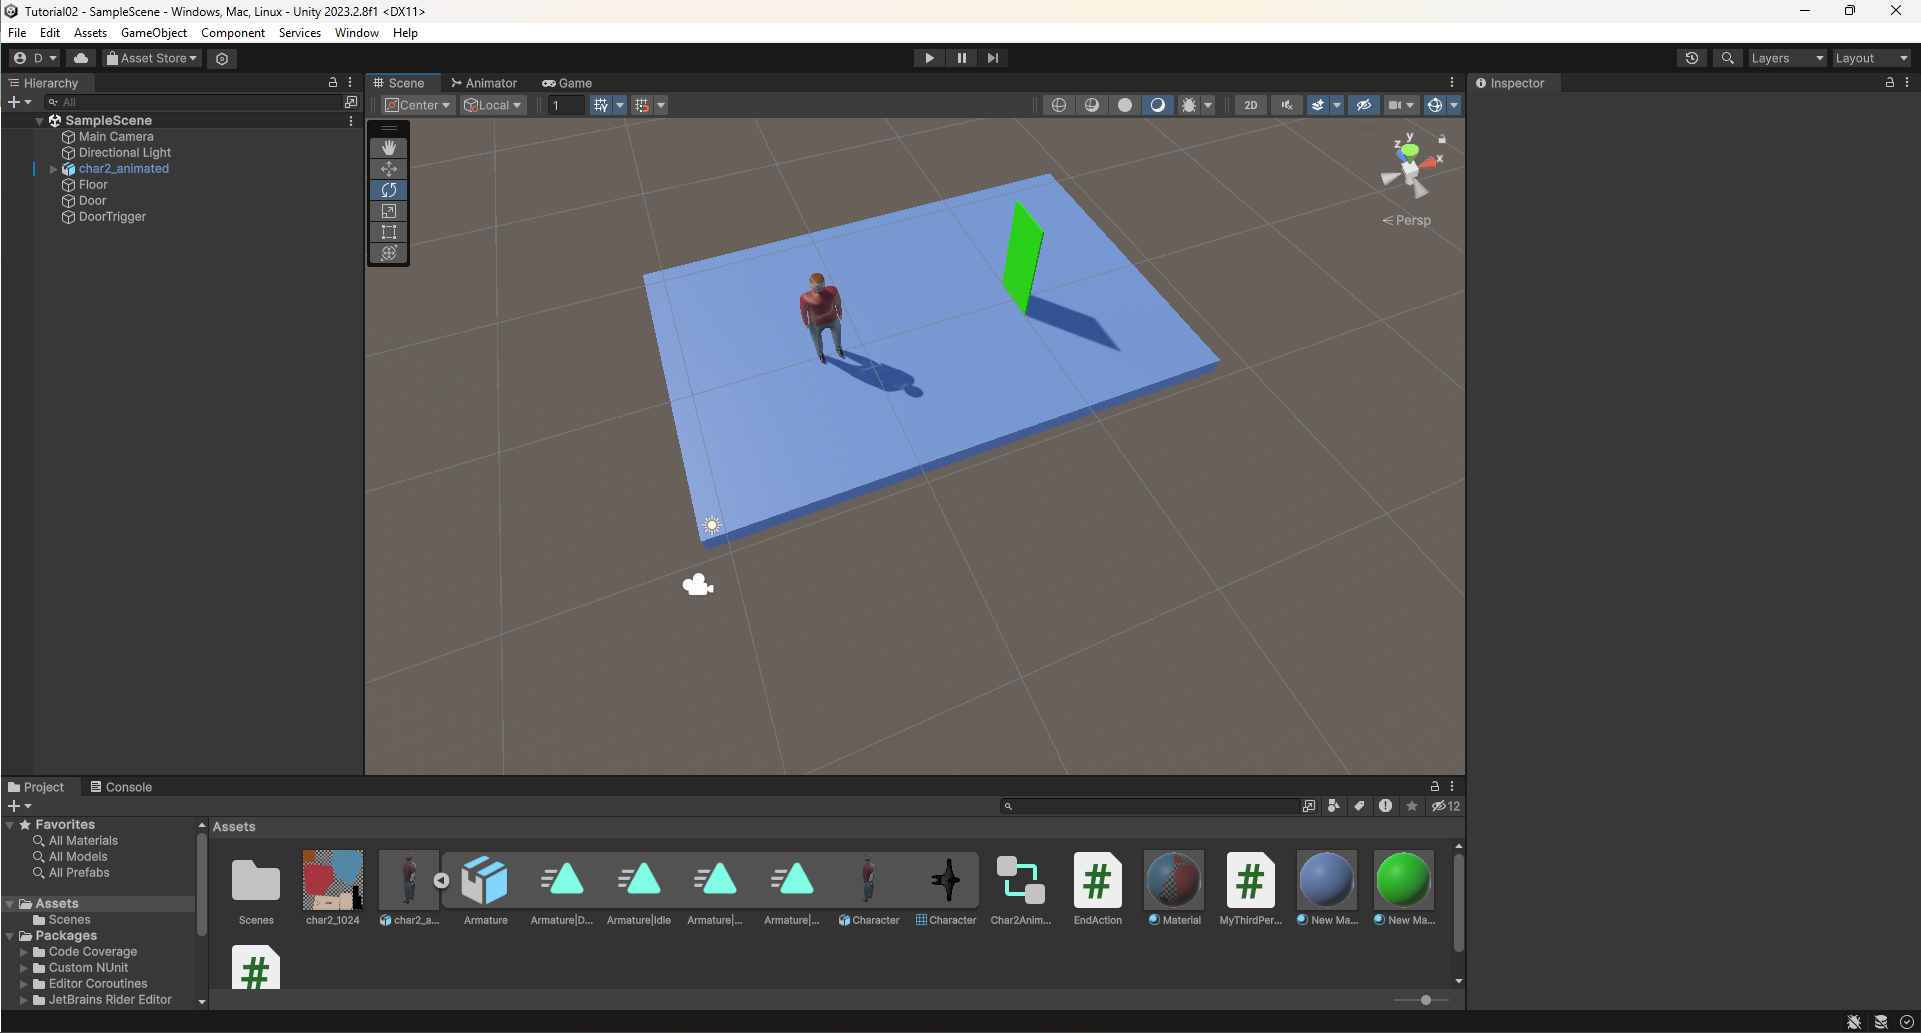
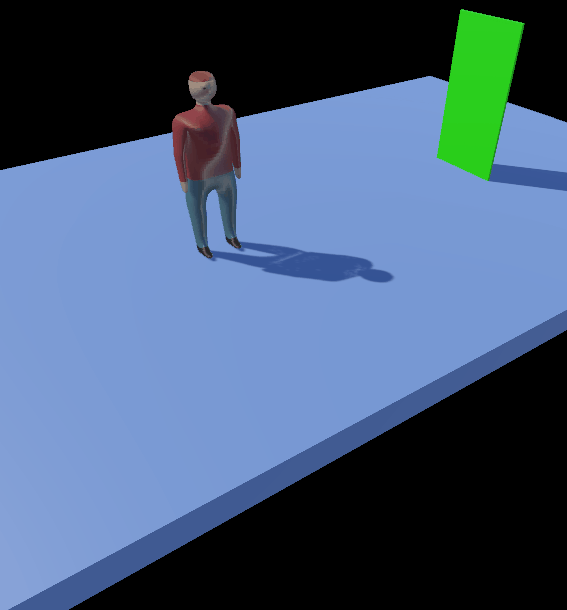
To finish up this week, here is a screenshot of the finished product in Unity, followed by a gif demonstrating the different actions which the user can take. I hope you've enjoyed reading this week's blog posts as much as I have creating them :)
I have now added a playable version of this level to my profile if you would like to give it a try.
Leave a comment
Log in with itch.io to leave a comment.